Showing posts with label Template. Show all posts

Tuesday, September 13, 2016

Moving the Widepoint of a Surfboard Template

To move the widepoint, you adapt the method used for resizing a full-size surfboard template (basic math based).  Follow this link for the full-size template method:

http://bgboard.blogspot.com/2016/01/re-sizing-full-size-surfboard-template.html


Basically, you re-size the template as two different sections.  The front section is from the widepoint forward and the rear section would be from the widepoint to the tail.  It is not complicated but takes a bit of thought to see it.


You re-size the length of the front and rear sections of the template independently/separately.   The original template widepoint is the dividing line between the front and rear sections. You increase and decrease the lengths of each section accordingly to move the widepoint forward or backward.


To move the widepoint back 3 inches, you would lengthen the nose section by 3 inches and shorten the tail section by 3 inches.  To move the widepoint forward 3 inches, you would shorten the nose section by 3 inches and lengthen the tail section by 3 inches.  Use the same math-based method you would use to lengthen and shorten a full-size template (see link above).

I may expand this disussion with some diagrams at a later date... 

Sunday, January 31, 2016

Surfboard Design Blog -- Directory

Surfboard Rail Profile Template Design
Dolphin Wing: Wing-Tail Surfboard Design

Dolphin Wing/Tail Evolution: aka "Stoneburner Tail"
Hotwire Foam Cutter Power Source / Supply & Wire

Polystyrene Foam Types & Specifications: XPS & EPS

Paddle-In Hydrofoil (PIH) Surfboard

Modify Aquarium Air Pump for Vacuum: Whisper AP 150

Resin Warmer: Low Budget
XPS Peel Panel Tests

MountainBoard (MB) & MB-Longboard Hybrids: Custom Assemblies / Builds

Circular Velocity/Acceleration in Ocean Waves & Surfing Physics
http://bgsurfphysics.blogspot.com/2015/05/below-are-some-figuresdiagrams-of.html

Surfable Wave Speed
http://bgsurfphysics.blogspot.com/2016/09/surfable-wave-speed.html

Wave & Surfing Speeds
http://bgsurfphysics.blogspot.com/2018/08/wave-surfing-speeds.html


Tuesday, January 5, 2016

Re-Sizing a Full-Size Surfboard Template


Re-sizing a Full-Size Surfboard Template

It is easy to proportionally re-size a full-size surfboard template and maintain clean curves that are derived from the original template shape.  It can be done by hand and with "simple" math.  You can re-size a template with nothing more than a framing square, a pencil and a batten or a large curve.  It can be done on the floor of a porch, kitchen or garage.  While a calculator is easier, you do not need one to do basic math.

For a directly proportional re-size, the new dimensions must vary precisely.  The aspect ratio must be locked.  Width changes by the same proportion as length.  With aspect ratio locked, a 20" x 72" shape that is re-sized to be directly proportional increases to 21.66" x 78" (light blue ellipses below).  This represents a 0.277" increase of the maximum width for every 1.0" increase in length.  However, length and width can be re-sized independently of one another to create a desired combination of length and width (aspect ratio unlocked).


Somebody might specifically want a 5'10" Takayama Scorpion shape that is 23" or 19.25" wide rather than the original 21.25" width.  The proportional math method discussed below maintains the basic shape while varying one dimension with the other dimension (width or length) remaining fixed.  Curve "steepness/flatness" (slope) of the planshape outline is definitely altered by changing one dimension while the other remains fixed.  But the curve's slope changes are still in the same position relative to the original shape/template.  This method can also be a good way to evaluate the effect that varying one dimension has on surfboard performance, while the other dimensions remain fixed.  But, both length and width dimensions can be altered independently for a template also.

I will use a Lis Fish figure (Kinstle, 1977) to illustrate the method described below.  Dimensions shown in all figures below are those of the original figure and have not been re-labeled to show the increases or decreases discussed.  

To re-size a full-size template, first divide desired length or width by original template length or width, respectively.  In this example, the objective is to increase template/surfboard width from 21" to 23".  Divide 23" by 21".   This gives you 1.095.  The measured widths of the Lis Fish template below (Figure 1) are at 6" intervals.  Now multiply each of these widths by 1.095 and you have the new widths for the same 6" intervals.  To decrease template width from 21" to 19" divide 19" by 21".  This gives you 0.905.  Now multiply the original widths by 0.905 and you have the new narrower widths for each of the original 6" intervals.  For either, plot and connect these new width points with a smooth, continuous curve.  You could use the old template or a flexible strip/batten to draw the curved outline.

Fig 1.  Lis Fish templates: original width (21 inches), wider (23 inches) and narrower  (19 inches).  All three are the same length.


To increase template length from 65" to 74", divide the new length (74”) by the original template length (65"), 74/65 = 1.138.   The original template widths will now be placed at 6.828" intervals (1.138 x 6") instead of the original 6" intervals.  To decrease length to 56", divide the new length by the original length (56/65 = 0.862).  Now place the old template widths at 5.172" intervals (0.862 x 6") instead of the original 6" intervals.  Again, plot the points and connect them with a smooth, continuous curve (Figure 2).  

If you plan to change both width and length for the new template, it is easier to calculate and plot the new length intervals first.

Fig 2.  Lis Fish templates: original length (65-inch), longer (74-inch) and shorter (56-inch).  All three are the same width.


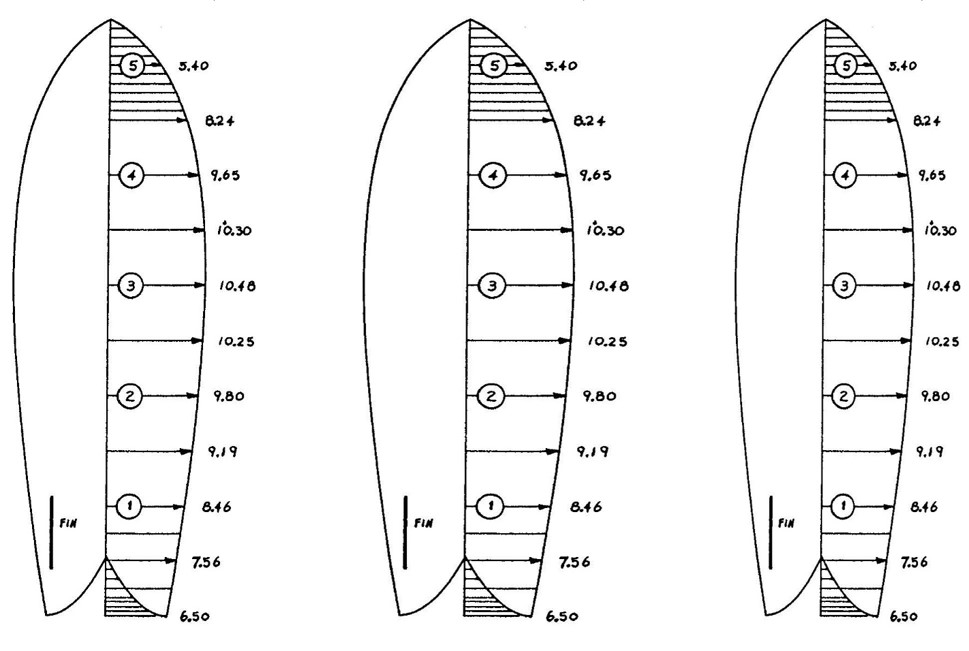
To improve nose and tail shape resolution, you can measure template widths at 1-inch intervals for several inches (Figure 3 at bottom of page) -- starting measurements from the template tips (nose and tail).  Similarly, rather than using 6-inch intervals to measure the original template widths, you could use 2- to 3-inch intervals.  Whatever length interval suits you.  The closer together the width measurements are, the better the shape resolution will be overall.  These new intervals will be increased or reduced to increase or decrease template dimensions using the same method described above.

One good template can be used to generate many different combinations of length and width.  By varying one dimension at a time, it is fairly easy to evaluate the effect that changing one variable has on a shape's performance.

Other methods can be used to re-size surfboard templates.  The discussion above is one approach.  Accept.  Reject.  It does not affect me.

["If" you want to maintain the same rocker curve -- curve slope (steepness/flatness); tangent angles relative to given points -- you have to multiply the rocker heights by the same proportion that the length changes.  Otherwise, the rocker curve slope becomes steeper or flatter; bottom angle relative to the water surface changes and is different.  But, maintaining the same rocker curve slope may not be well suited for the new length.]

Moving the widepoint of a surfboard template would use a variant of this method.  Discussed at the following link:

http://bgboard.blogspot.com/2016/09/moving-widepoint-of-surfboard-template.html

Surfboard Design Blog Directory

Figure 3.  Steve Lis Fish
Kinstle, J.F.  1977.  Surfboard Design and Construction, p. 61.  Published by Natural High Express Publishing, Long Beach, CA.


Thursday, November 12, 2015

Ellipse-Based Surfboard Rocker

Ellipse-Based Bottom Rocker:


The following examples are used to explain a method for creating ellipse based surfboard rockers.  These rocker examples are for illustration of the method.  Actual ellipse heights and lengths must be adjusted to create rockers that are suitable for specific surfboard designs.

The blue ellipse-based rocker shown above was done with 2 ellipses of different sizes joined at the (vertical) midline when completed.  Both Ellipses have the same width (same as board planshape).  Pick the desired nose and tail rocker heights.  Draw a straight line the length of the board -- I used a rectangle instead of a straight line.   Mark where the surfboard wide point would be on that straight line.  Align the (vertical) midline of each ellipse with the widepoint mark on the straight line.  Now place marks (or boxes) of the desired nose and tail rocker heights at the appropriate ends of the straight line.  Stretch the length of each ellipse, independently of one another until each elliptical curve touches the corner of both the nose and tail boxes.  Join each of the half-ellipses at their midlines and trim the ends of the ellipses off at the points where their curves are touching the box corners at each end of the straight line.  This creates an ellipse-based surfboard bottom rocker.


Hope this makes sense.  Turned out wordier than expected.  Very simple when viewed and created as a graphic (below).  Purple is the nose rocker ellipse and red is the tail rocker ellipse.  Green boxes are 2.0" high (tail rocker) and 4.7" high (nose rocker).  Line widths were increased from 1.0 pt to 1.5 pt for blog posting.


Combining Ellipses with Different Heights

I chose ellipses with heights equal to board width in the example above.  Varying ellipse height changes the shape of either nose or tail rocker curve.  Increasing ellipse height will make the curves rounder.  Decreasing ellipse height will make the curves flatter.  That is, as ellipse height gets closer to its length, the curves become more circular.  As ellipse height approaches zero, the curves become flatter.  While the ellipse curve becomes flatter overall, with decreasing height, the curves near the tips become steeper.  Also, with ellipse height fixed, the curve becomes more circular as the length shortens and flatter as length increases.

The figures below all have the same tail ellipse (height = board width).  Board length is still 7'6" (blue rectangle).  Two of the nose ellipse heights are either greater (top figure) or less (bottom figure) than board width.  Ellipse lengths must be stretched or compressed accordingly.  (Ellipse heights cannot be less than 2x nose or tail rocker height.) 


I have been working on ellipse-based surfboard design techniques for several years.  I came up with a planshape method that satisfied me this year.  I recently began using ellipses to design bottom rocker curve and rail profile.  I recently refined my ellipse-based rail profile design technique. Rather than post all of these elliptic concepts here, I decided to start new blog posts at these links:

Links to the other elliptic surfboard design posts:

Ellipse-based rails
http://ellipticsurfboard.blogspot.com/2015/11/ellipse-based-rail-profile.html
Ellipse-based planshape
http://ellipticsurfboard.blogspot.com/2015/11/ellipse-based-surfboard-planshape.html
Ellipse-based fin
http://ellipticsurfboard.blogspot.com/2016/03/ellipse-based-surfboard-fin.html
Ellipse-based tail template
http://ellipticsurfboard.blogspot.com/2015/11/ellipse-based-tail-templates.html


Saturday, March 8, 2014

Surfboard Rail Profile Template Design

March 8, 2014


[Update: November 2015 -- I recently developed an ellipse-based rail profile design method. View at the following link:
http://ellipticsurfboard.blogspot.com/2015/11/ellipse-based-rail-profile.html ]


After seeing the recent resurrection of rocker profile measurement discussions at Swaylocks and the insistence about the correct methodology for precision, I decided to post something beyond my original comments in this thread:

http://www.swaylocks.com/forums/railsrailsrailsrails

It seems that rail design and communicating it are the purview of a mystical realm.  Shape is determined when the rail is grabbed by the "hand" of a shaman.

A surfboard rail profile is no less a "foil" than the leading edge of a wing.

Traditional "surfboard foil" is the change in thickness from nose to tail:


What I refer to as rail profile/foil is the shape of the rail's curve as seen from a width-wise cross section of the surfboard -- depicted below using a NACA wing profile image:


Consistent rail design and replication require nothing more than templates, or a good tool (a contour gauge) for measuring an existing rail profile like this one presented by John Mellor at the following link:

http://www.swaylocks.com/sites/default/files/rail_gauge.jpg


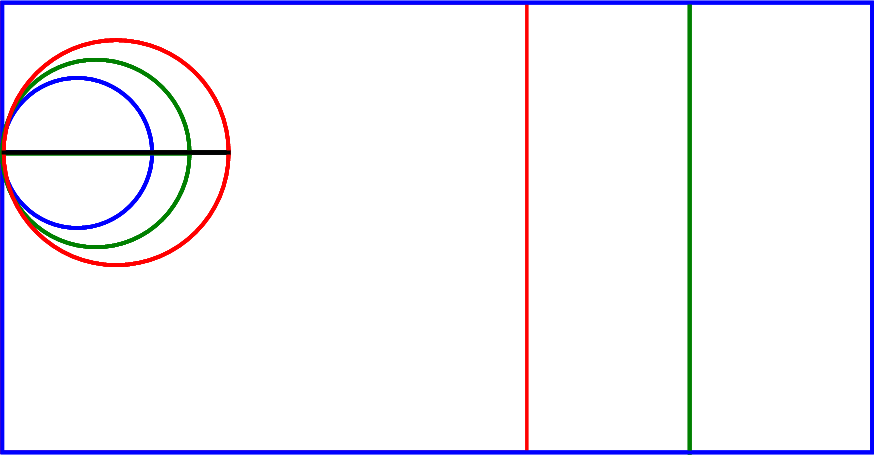
All that is needed for rail profile template design and replication is basic geometry -- a circle and a rectangle -- combined with a drawing curve (french curves or ships curves).   See the diagrams at the bottom of the page.

The circle circumference defines the edge of the rail.  Circle diameter and the location of its center relative to the height of the rectangle create pinched, boxy, up, down, 50/50, 60/40, 70/30, hard or soft rails.  Circle diameter and the location of its center also affect tuck.

Length of the rectangle defines the point of blending with the deck.  Height of the rectangle defines the thickness of the board/blank at any given point.

The circle is placed tangential to the outer wall (height) of the rectangle.  The center is moved up and down the height.  A drawing curve is used to draw two curves that are tangential to the circle and blended with top and bottom (lengths) of the rectangle.

Once created, a single rail profile diagram can be proportionally re-sized for any given board thickness.

The same "tangent angles" (to the rail curve) could be used to define rail bands for any profile -- more geometry.

The geometry is simple. It can easily be done by hand.  But I am sure it would be simple for some CAD jockey to create a program that does this effortlessly.

IMO the realm of surfboard rail profile design is wide open and unexplored.

Simple graphics for illustration are below:

Accept.  Reject.  It does not affect me.

Surfboard Design Blog Directory
http://bgboard.blogspot.com/2016/01/surfboard-design-blog-directory.html


Saturday, October 5, 2013

Making a Surfboard Template from a Photo or Image

Making a template from an image or photo is very similar to a method for re-sizing a full-size surfboard template.

The following can be done with math solely (see last 7 paragraphs).  Basically you are proportionally re-sizing the image to the length and width you would like for your template.

I will assume you have the picture saved on your computer.  The higher the image resolution is, the better the end result will be.

If you have Adobe Photoshop (or you can insert the image into a MS Powerpoint slide), crop the picture so that the surfboard shape just touches the sides of the cropped rectangle (the widest points, and the tail tip and the nose tip).  The image cropping box method is the quick approach but is less precise.

First re-size the cropped image's dimensions, with "proportions constrained" feature on ("aspect ratio locked"),  to be proportional to the desired "length" (e.g. 7" for 7 feet or 14" for 7' or 21" for 7' etc.)

Next, decide what width you want the board to be.  Turn off constrained proportions (unlock aspect ratio) and type in the width dimension you want using the same scaling used for the length (2" = 1', etc.).

Save and you have a shape that matches your desired dimensions.  (The larger you make the image the more pixelated the outline will become).

You can now transfer the image to graph paper or to template material by plotting measurements onto template material with a grid marked on it (e.g. 1-inch or 2-inch squares).  The template shape will have the exact dimensions you want, based on the dimensions of the re-sized picture.

Use a good top or bottom view photo, and decide the desired length and width dimensions.  BTW the surfboard in the photo/image you will use must aligned in the vertical dimension like atomized's picture (below) for an easy computer crop.  Otherwise, you need to print, crop by hand, then scan and re-size.

I have used a photo posted by atomized at Swaylocks.com for a quick demonstration (cropping not perfect).  Hand cropping and re-scanning is needed for photos not aligned with vertical or horizontal axes.  Again, all of this can be done mathematically using the original image dimensions multiplied by the proportional change in the desired dimension.

1.  First picture, cropped "quickly" and image length re-sized to 9" = 9'..


Then proportionally re-sized to 7" for a 7' board with dimensions proportional to the original 9' shape, 7" = 7' (width narrows, Aspect Ratio Locked).


Length re-sized to 7" (7') but width remains the same as the original 9' board. (Aspect Ratio Unlocked).


2.  Another example using a Donald Takayama Scorpion photo:

Below, the original image was "quickly" cropped, re-sized proportionally and scaled so length would be 5'10" (Proportions Constrained, Aspect Ratio Locked) width would be less than 21.25", scale 2" = 1'.


After the Image above was re-sized and scaled to a length of 5'10", width was then changed to 21.25" with "proportions not constrained" (Aspect Ratio Unlocked), scale 2" = 1'


Blowing up a photo to full size is not the way to go.  Enlarging the photo to scale -- 1 to 3 inches = 1 foot -- keeping the outline reasonably well defined and then re-plotting to template material, with or without a graph paper intermediate, is the way to use photos or images without using CAD driven design software.

In the Scorpion example, I would not draw a center line/stringer line.  I would measure image width at regular intervals and then divide by 2 for re-plotting as a template.  I like to true up the shape with french curves or ships curves on graph paper before re-plotting to template material.  Even though the photo images are re-sized in inches, I measure the image dimensions in millimeters for re-plotting to graph paper.  The flexible rod/wood-strip method could be used to connect outline points plotted directly onto the actual template material also.

I decided I needed to brush up on my basic Photoshop skills.  So I created several different versions of a much cleaner re-sized Scorpion image, in PNG format (images at bottom of page).  For a surfboard 21.25" wide and 5'10" long, the actual surfboard "image dimensions" should be 3.54 inches wide by 11.666 inches long, where 2 inches = 1 foot.

BTW I did not actually use the cropping method mentioned above.  It is quick and easy but less accurate.  It is easier to explain and demonstrate the re-sizing technique that way also.

Basically, I re-sized the entire original photo of the image.  That re-sized scale image is at the bottom of this page.

1. Print original image.
2. Measure printed surfboard image length and width.
3. Re-size original photo proportionally to get the correct length to for the desired scale.
4. Using the scale for the new length, calculate the desired width in inches and the proportional change.  For example, let us say the new scaled length should be 10 inches.  Original image length is 7 inches.  Proportional change is 10 divided by 7 = 1.43.
5. Unlock constrained proportions (aspect ratio), then proportionally re-size "photo width" accordingly.
6.  Save.
7.  If necessary. I crop the re-sized photo to fit my desired paper size.

Then measure and plot on graph paper or convert re-sized photo dimensions to full-size units and transfer to the grid on the template material.

This can be done using JPEG or PDF template images too to get any combination of length and width.


Re-sizing an Image/Photo with Math

Re-sizing can be done using math solely, re-plotting adjusted dimensions on graph paper or a template grid -- without computer programs.  Let's say the original image is 7.5 inches long and 2.06 inches wide.  You decide you want a scale of 2 inches = 1 foot.  The desired scaled size of the new image is 3.54 inches wide and 11.666 inches long -- for a board that will be 21.25 inches wide and 5 feet 10 inches long.  First, measure image widths at regular intervals along the length of the original image.  For example, you could measure image widths every 0.5 inch along the length.

Now, divide the desired scaled image length of 11.666 inches by the original image length (7.5 inches).  That gives you 1.555.  This is the proportional increase of original image length needed.  So multiply the 0.5-inch length intervals by 1.555 where you measured widths.  Your scaled width measurements will now be every 0.778 inch along the new length of 11.666 inches, rather than every 0.5 inch along the original image length of 7.5 inches.

Widths must now be proportionally re-sized.  Divide desired scaled image max width (3.54 inches) by original image max width (2.06 inches).  Divide 3.54 by 2.06 and you get the proportional increase needed (1.72) for the original image widths measured.  That is, multiply each of the original image widths you measured by 1.72.  You will plot these new widths every 0.778 inches along the new scaled length of 11.666 inches.  Now plot these points on graph paper or template material.  Connect these plotted points with a smooth curve and you are ready to make your template.
Measuring the images in millimeters is more precise, 1.0 inch = 25.4 millimeters.

December 23, 2015

Re-sizing a Full-Size Surfboard Template with Math

It is easy to proportionally re-size a full-size surfboard template and maintain clean curves that are derived from the original template shape.  For re-sizing, you will divide desired length or width by original template length or width, respectively.  
[For an expanded discussion using Lis Fish figures, click this link:
http://bgboard.blogspot.com/2016/01/re-sizing-full-size-surfboard-template.html ]

For this simple example, the objective is to increase template/surfboard width from 19.75" to 21".  Divide 21" by 19.75".   This gives you 1.063.  Measure widths of the full-size template at 12" intervals.  Now multiply each of the these widths by 1.063 and you have the new widths for the same 12" intervals.  Plot and connect these new width points with a smooth, continuous curve.  You could use the old template or a flexible strip/batten to draw the curved outline.

To make a template shorter, divide the new length (74”) by the old template length (80").  Divide 74” by 80” (= 0.925).  Now place the previous template widths at 11.1" intervals (0.925 x 12") instead of 12" intervals.  Plot the points and connect them with a smooth, continuous curve.

To improve nose and tail shape resolution, you can measure template widths at 1-inch intervals for the first several inches, starting at the template tips/ends.  Similarly, rather than using 12-inch intervals to measure the original template widths, you could use 2- to 3-inch intervals.  Whatever length interval suits you.  The closer together the width measurements are, the better the shape resolution will be overall.
_____