March 8, 2014
[Update: November 2015 -- I recently developed an ellipse-based rail profile design method. View at the following link:
http://ellipticsurfboard.blogspot.com/2015/11/ellipse-based-rail-profile.html ]

http://www.swaylocks.com/forums/railsrailsrailsrails
A surfboard rail profile is no less a "foil" than the leading edge of a wing.
Traditional "surfboard foil" is the change in thickness from nose to tail:
What I refer to as rail profile/foil is the shape of the rail's curve as seen from a width-wise cross section of the surfboard -- depicted below using a NACA wing profile image:
Consistent rail design and replication require nothing more than templates, or a good tool (a contour gauge) for measuring an existing rail profile like this one presented by John Mellor at the following link:
http://www.swaylocks.com/sites/default/files/rail_gauge.jpg
[Update: November 2015 -- I recently developed an ellipse-based rail profile design method. View at the following link:
http://ellipticsurfboard.blogspot.com/2015/11/ellipse-based-rail-profile.html ]

After seeing the recent resurrection of rocker profile measurement discussions at Swaylocks and the insistence about the correct methodology for precision, I decided to post something beyond my original comments in this thread:
It seems that rail design and communicating it are the purview of a mystical realm. Shape is determined when the rail is grabbed by the "hand" of a shaman.
Traditional "surfboard foil" is the change in thickness from nose to tail:
What I refer to as rail profile/foil is the shape of the rail's curve as seen from a width-wise cross section of the surfboard -- depicted below using a NACA wing profile image:
Consistent rail design and replication require nothing more than templates, or a good tool (a contour gauge) for measuring an existing rail profile like this one presented by John Mellor at the following link:
http://www.swaylocks.com/sites/default/files/rail_gauge.jpg
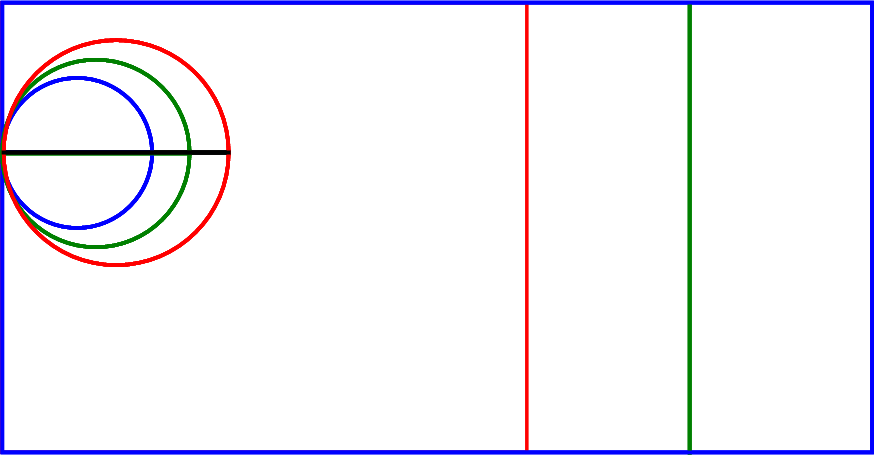
All that is needed for rail profile template design and replication is basic geometry -- a circle and a rectangle -- combined with a drawing curve (french curves or ships curves). See the diagrams at the bottom of the page.
The circle circumference defines the edge of the rail. Circle diameter and the location of its center relative to the height of the rectangle create pinched, boxy, up, down, 50/50, 60/40, 70/30, hard or soft rails. Circle diameter and the location of its center also affect tuck.
Length of the rectangle defines the point of blending with the deck. Height of the rectangle defines the thickness of the board/blank at any given point.
The circle is placed tangential to the outer wall (height) of the rectangle. The center is moved up and down the height. A drawing curve is used to draw two curves that are tangential to the circle and blended with top and bottom (lengths) of the rectangle.
Once created, a single rail profile diagram can be proportionally re-sized for any given board thickness.
The same "tangent angles" (to the rail curve) could be used to define rail bands for any profile -- more geometry.
The geometry is simple. It can easily be done by hand. But I am sure it would be simple for some CAD jockey to create a program that does this effortlessly.
IMO the realm of surfboard rail profile design is wide open and unexplored.
Simple graphics for illustration are below:
Simple graphics for illustration are below:
Accept. Reject. It does not affect me.
Surfboard Design Blog Directory
http://bgboard.blogspot.com/2016/01/surfboard-design-blog-directory.html


Thanks for this post, great information! I'd love to share this post on my blog.
ReplyDeleteRail Profile
You may link to the post and photos, just cite "stoneburner" at Swaylocks...
ReplyDeleteStill good
Deletestoneburner Many thanks for sharing!! Very excellent.
ReplyDelete